Imagine this: you're sitting on a beach sipping a cold drink while your home automation system is running smoothly, all thanks to your Raspberry Pi setup. Sounds cool, right? Well, remote IoT monitoring with Raspberry Pi isn’t just a dream—it’s a reality that’s changing how we interact with technology. Whether you’re a tech enthusiast or someone looking to streamline their smart home, this guide will walk you through everything you need to know about setting up and managing a remote IoT system using Raspberry Pi.
Let’s face it—IoT is not just a buzzword anymore. It’s a game-changer. And when you combine it with the power of Raspberry Pi, you’ve got yourself a dynamic duo that can do wonders. From monitoring environmental conditions to controlling smart devices, the possibilities are endless. But how exactly do you set up remote IoT monitoring with Raspberry Pi? That’s what we’re here to break down for you.
In this article, we’ll dive deep into the world of Raspberry Pi and IoT, giving you actionable insights and step-by-step guidance. Whether you’re a beginner or an advanced user, this guide will help you take your IoT projects to the next level. So buckle up, because we’re about to embark on a tech journey that’ll make you the smartest person in the room—well, at least when it comes to remote IoT monitoring!
Read also:Taylor Kitsch Wife The Story Behind The Beautiful Union
What is Remote IoT Monitoring?
Remote IoT monitoring is basically like having eyes and ears everywhere, even when you’re miles away. Imagine being able to check the temperature of your greenhouse, the status of your home security system, or the performance of your industrial equipment—all from your smartphone or laptop. That’s the magic of IoT, powered by devices like Raspberry Pi.
At its core, remote IoT monitoring involves collecting data from sensors or devices and transmitting it to a central platform where you can access and analyze it in real-time. This process allows you to keep tabs on various systems without physically being present. And with Raspberry Pi, you’ve got a versatile, cost-effective tool that can handle everything from data collection to cloud integration.
Why Choose Raspberry Pi for IoT?
Now, you might be wondering why Raspberry Pi is such a big deal in the IoT world. Let’s break it down:
- Cost-Effective: Raspberry Pi is super affordable, making it accessible for hobbyists and professionals alike.
- Versatile: It can be customized to fit a wide range of applications, from simple home automation to complex industrial setups.
- Community Support: With a massive community of users and developers, you’ll never run out of resources or support.
- Open Source: Raspberry Pi runs on open-source software, giving you the freedom to experiment and innovate.
So, whether you’re building a weather station or monitoring your pet’s activity, Raspberry Pi has got your back.
Setting Up Your Raspberry Pi for IoT
Before you dive headfirst into remote IoT monitoring, you’ll need to set up your Raspberry Pi properly. This section will walk you through the basics, ensuring you’re ready to rock and roll.
Hardware Requirements
Here’s what you’ll need to get started:
Read also:Eva Green Husband A Journey Through Love And Stardom
- Raspberry Pi (any model will do, but Pi 4 is recommended for better performance)
- MicroSD card (at least 16GB)
- Power supply
- Sensors or devices you want to monitor (e.g., temperature sensors, cameras, etc.)
- Wi-Fi or Ethernet connection
Once you’ve gathered all the essentials, it’s time to move on to the software side of things.
Software Setup
To set up your Raspberry Pi for IoT, follow these steps:
- Download the latest version of Raspberry Pi OS from the official website.
- Use a tool like Balena Etcher to flash the OS onto your MicroSD card.
- Insert the MicroSD card into your Raspberry Pi and power it up.
- Connect your Pi to your network via Wi-Fi or Ethernet.
- Update the OS using the terminal command:
sudo apt update && sudo apt upgrade.
And just like that, your Raspberry Pi is ready to take on the world of IoT!
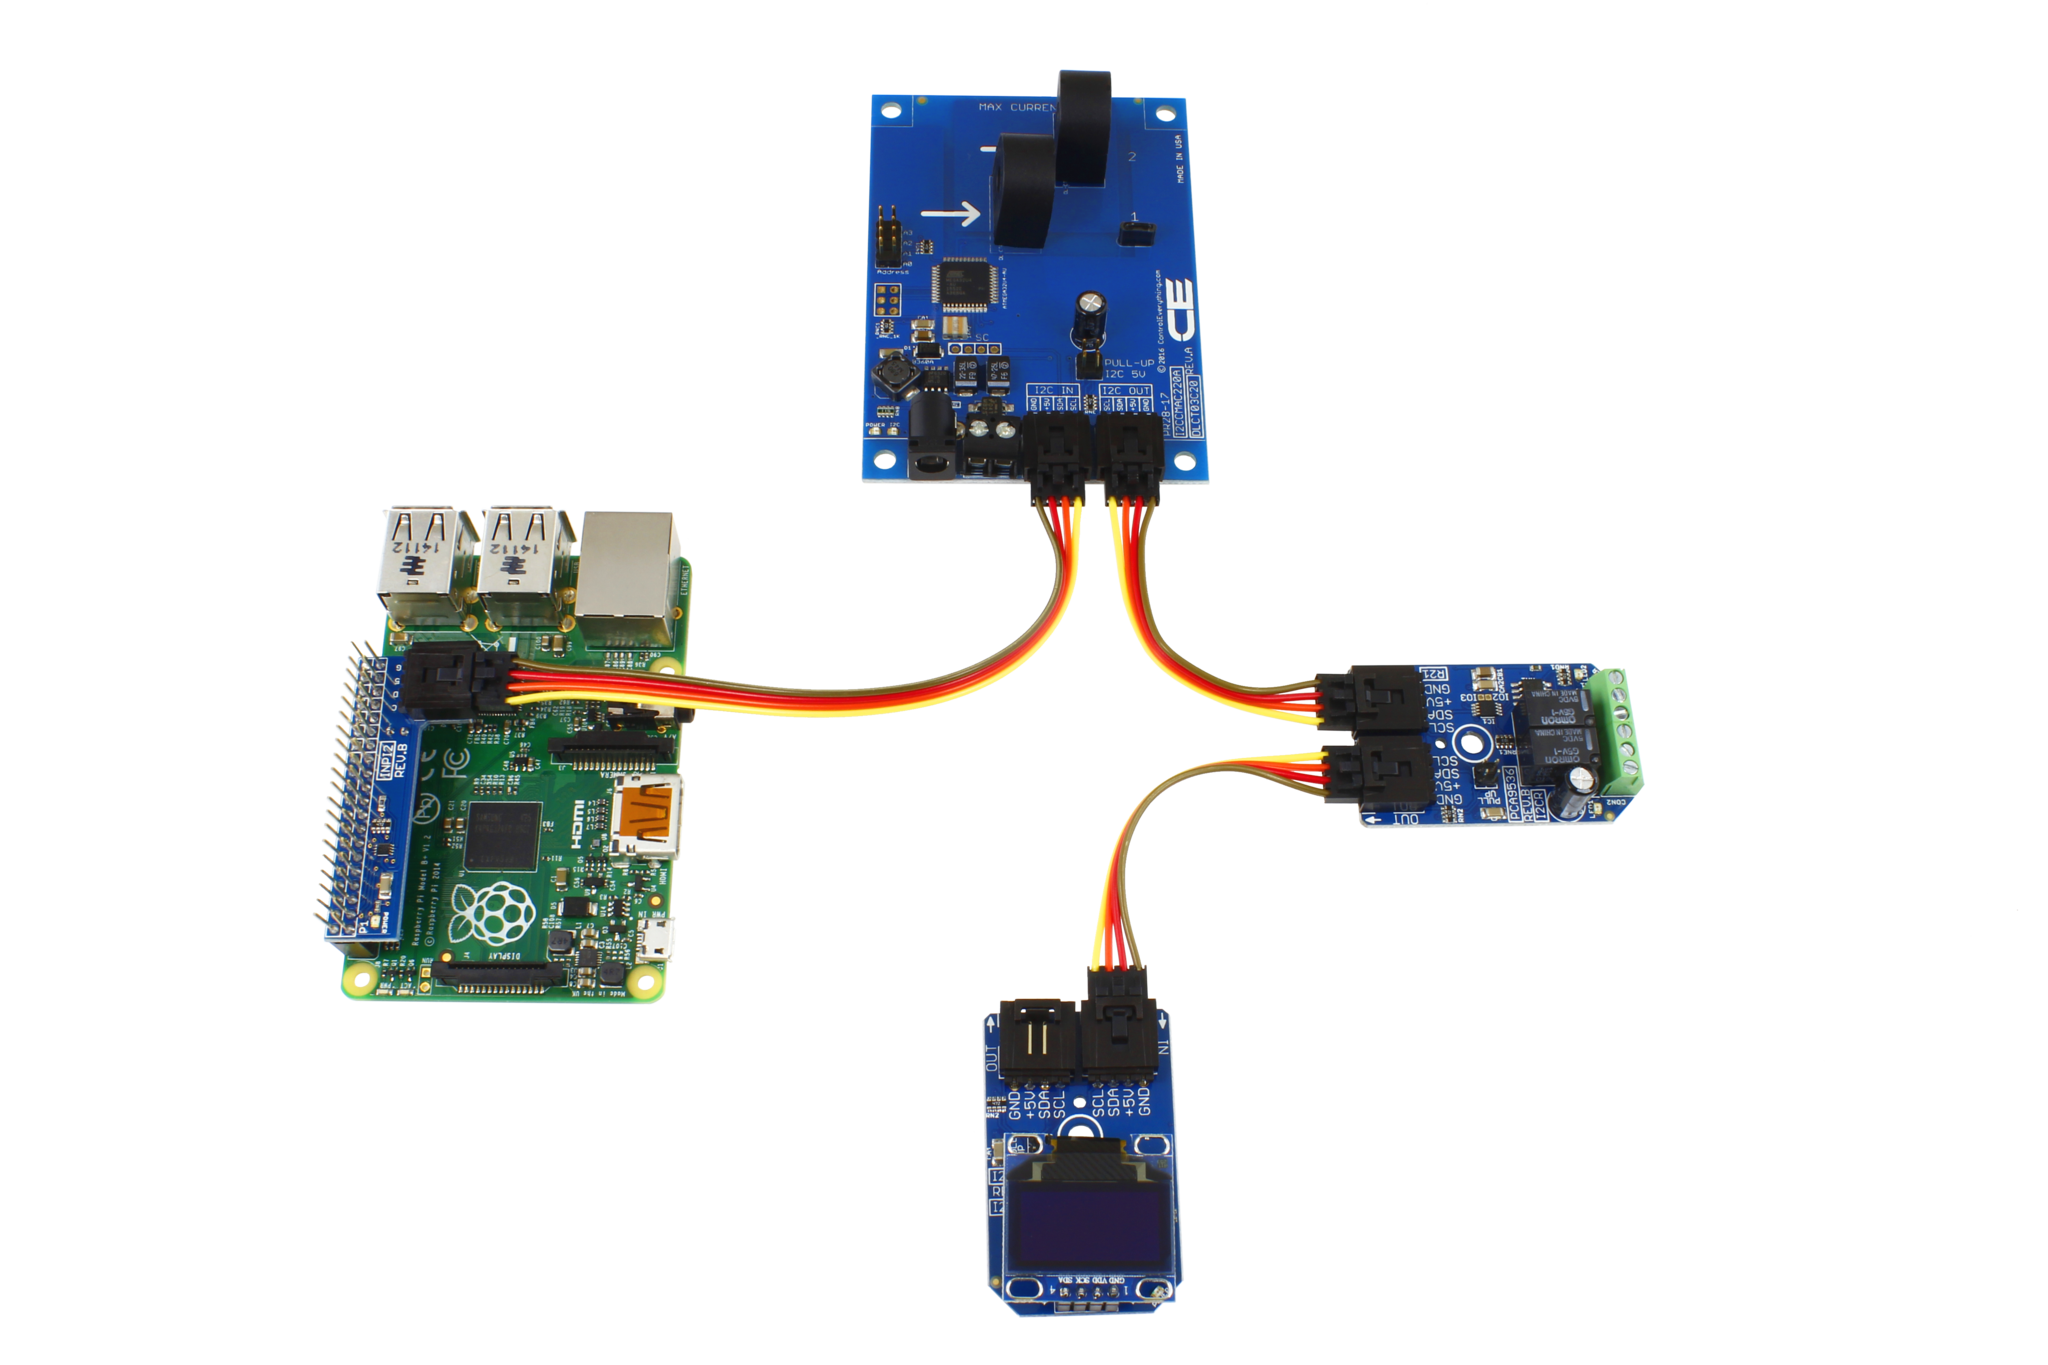
Connecting Sensors to Raspberry Pi
Sensors are the backbone of any IoT system. They’re the ones collecting the data that makes remote monitoring possible. Here’s how you can connect sensors to your Raspberry Pi:
Popular Sensors for IoT
Some of the most commonly used sensors in IoT projects include:
- DHT11/DHT22: For measuring temperature and humidity.
- MQ-2: For detecting gas and smoke.
- PIR Motion Sensor: For detecting movement.
- DS18B20: For precise temperature measurement.
Each sensor has its own wiring and configuration requirements, so make sure to follow the manufacturer’s instructions carefully.
Wiring Sensors
When wiring sensors to your Raspberry Pi, here are a few tips to keep in mind:
- Always double-check the pin connections to avoid damaging your Pi.
- Use a breadboard to make wiring easier and more organized.
- Consider using a level shifter if your sensor operates at a different voltage than your Pi.
Once everything is wired up, it’s time to start coding!
Writing Code for IoT Monitoring
Programming your Raspberry Pi for IoT monitoring might seem intimidating at first, but with the right tools and resources, it’s actually pretty straightforward. Here’s how you can get started:
Choosing a Programming Language
Python is the go-to language for Raspberry Pi projects, thanks to its simplicity and extensive libraries. However, if you’re comfortable with other languages like C++ or JavaScript, you can use those too.
Example Code
Here’s a basic example of how you can read temperature data from a DHT22 sensor using Python:
import Adafruit_DHT sensor = Adafruit_DHT.DHT22 pin = 4 humidity, temperature = Adafruit_DHT.read_retry(sensor, pin) if humidity is not None and temperature is not None: print(f"Temp={temperature:.1f}°C Humidity={humidity:.1f}%") else: print("Failed to retrieve data from humidity sensor")
Save this code as a Python file and run it on your Raspberry Pi to start collecting data.
Setting Up Remote Access
Now that your Raspberry Pi is collecting data, it’s time to make it accessible remotely. Here’s how you can do it:
Using SSH
SSH (Secure Shell) allows you to access your Raspberry Pi from any device with an internet connection. To enable SSH:
- Open the terminal on your Pi.
- Type
sudo raspi-configand navigate to the SSH option. - Select “Enable” and reboot your Pi.
You can then use an SSH client like PuTTY to connect to your Pi from another device.
Cloud Integration
For a more seamless experience, consider integrating your Raspberry Pi with a cloud platform like AWS IoT or Google Cloud. This will allow you to store and analyze your data in the cloud, making it accessible from anywhere.
Data Visualization and Analysis
Data is only useful if you can make sense of it. Here’s how you can visualize and analyze the data collected by your Raspberry Pi:
Using Grafana
Grafana is a powerful tool for creating dashboards and visualizing data. Here’s how you can set it up:
- Install Grafana on your Raspberry Pi using the terminal command:
sudo apt install grafana. - Configure Grafana to connect to your data source (e.g., a database or cloud platform).
- Create custom dashboards to display your data in real-time.
With Grafana, you can turn raw data into actionable insights in no time.
Security Considerations
Security is a critical aspect of any IoT project. Here are a few tips to keep your Raspberry Pi setup secure:
- Use strong, unique passwords for your Pi and any connected devices.
- Enable a firewall to block unauthorized access.
- Keep your software and firmware up to date to protect against vulnerabilities.
- Consider using a VPN for added security when accessing your Pi remotely.
By following these best practices, you can ensure that your IoT system remains safe and secure.
Troubleshooting Common Issues
Even the best-laid plans can go awry sometimes. Here are some common issues you might encounter and how to fix them:
- Connection Problems: Check your network settings and ensure your Pi is connected to the internet.
- Code Errors: Double-check your code for typos or syntax errors.
- Sensor Malfunctions: Verify that your sensors are properly wired and functioning correctly.
Remember, troubleshooting is all about patience and persistence. Keep calm and code on!
Future Trends in IoT and Raspberry Pi
The world of IoT is evolving rapidly, and Raspberry Pi is right at the forefront of this revolution. Here are a few trends to watch out for:
- Edge Computing: Processing data closer to the source for faster insights.
- AI Integration: Using machine learning to enhance IoT capabilities.
- Sustainability: Developing IoT solutions that are eco-friendly and energy-efficient.
As technology continues to advance, the possibilities for IoT and Raspberry Pi will only grow. So stay tuned and keep innovating!
Conclusion
Remote IoT monitoring with Raspberry Pi is not just a tech trend—it’s a game-changer. From setting up your hardware and software to collecting, analyzing, and visualizing data, this guide has covered everything you need to know to get started. Remember, the key to success in IoT is experimentation and creativity. So don’t be afraid to try new things and push the boundaries of what’s possible.
Now it’s your turn to take action. Whether you’re building a smart home, monitoring environmental conditions, or creating an industrial automation system, Raspberry Pi has the power to make it happen. So grab your Pi, fire up your sensors, and let’s make the world a smarter place—one project at a time.
Got any questions or feedback? Drop a comment below or share this article with your tech-savvy friends. Together, let’s build a brighter, more connected future!
Table of Contents
- What is Remote IoT Monitoring?
- Why Choose Raspberry Pi for IoT?
- Setting Up Your Raspberry Pi for IoT
- Connecting Sensors to Raspberry Pi
- Writing Code for IoT Monitoring
- Setting Up Remote Access
- Data Visualization and Analysis
- Security Considerations
- Troubleshooting Common Issues
- Future Trends in IoT and Raspberry Pi